Corporate by day, blogger by night!
My blog is my creative escape and its just as multifaceted as I am - it chronicles my personal style, fashion I am coveting, beauty loves, and travel adventures. I like to think of it as a glimpse into my lifestyle and loves!
Welcome, I hope you enjoy xx
Saturday, 21 December 2013
Beyonce Blow Makeup Tutorial
One of the highlights of my week was the release of Beyonce's latest album and as I watched the visuals, I was taken by the variety and beauty of the makeup looks in the videos! One of my favorites is this look from the Blow video. Now, I am not a makeup artist, and I usually don't play around with this many colours on my face, but I was completely inspired and just had to attempt my own! How did I do? Video tutorial at the end of the post!
I messed up a little and got the lip gloss on my teeth, left in for comedic effect but I'm pretty sure you can skip that step for your version!
Tutorial -
- don't forget to subscribe!
The Flower Crown Beauty - Inspired by Lana Del Rey
I spotted this flower crown in Topshop over the weekend and immediately thought of Lana Del Rey and her trademark coloured garland and retro style makeup. I couldn't resist getting the crown as it would be the perfect accessory for my day at Wireless festival and Sandance later this summer. With my inspiration in full gear, I decided to film a festival makeup and outfit tutorial inspired by Lana Del Rey. I hope you like the pics :-)
The pictures below were my inspiration, and I added my little spin by incorporating a winged eye and bold lip to stand out against my white crop top.
I'm still editing the tutorial and should have it up this weekend but in the meantime, I hope you like the look!
Thanks for stopping by x
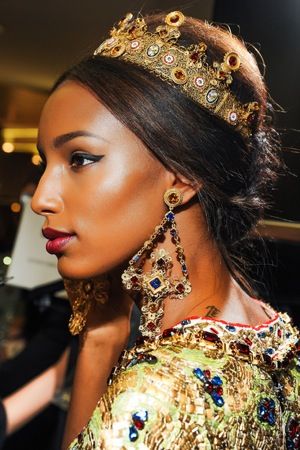
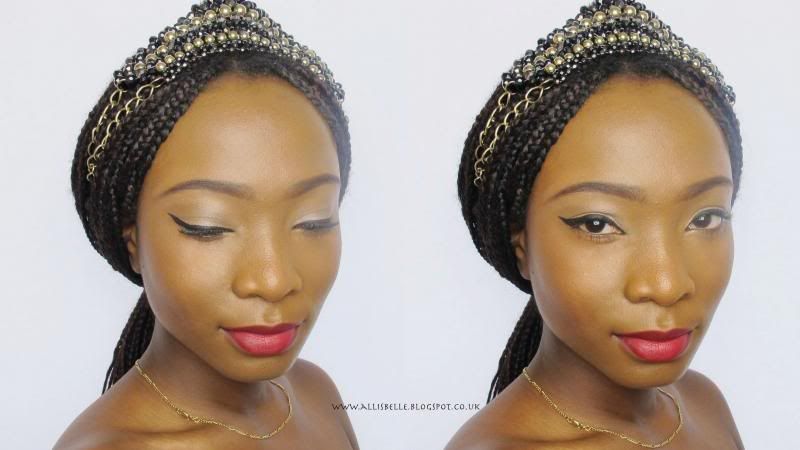
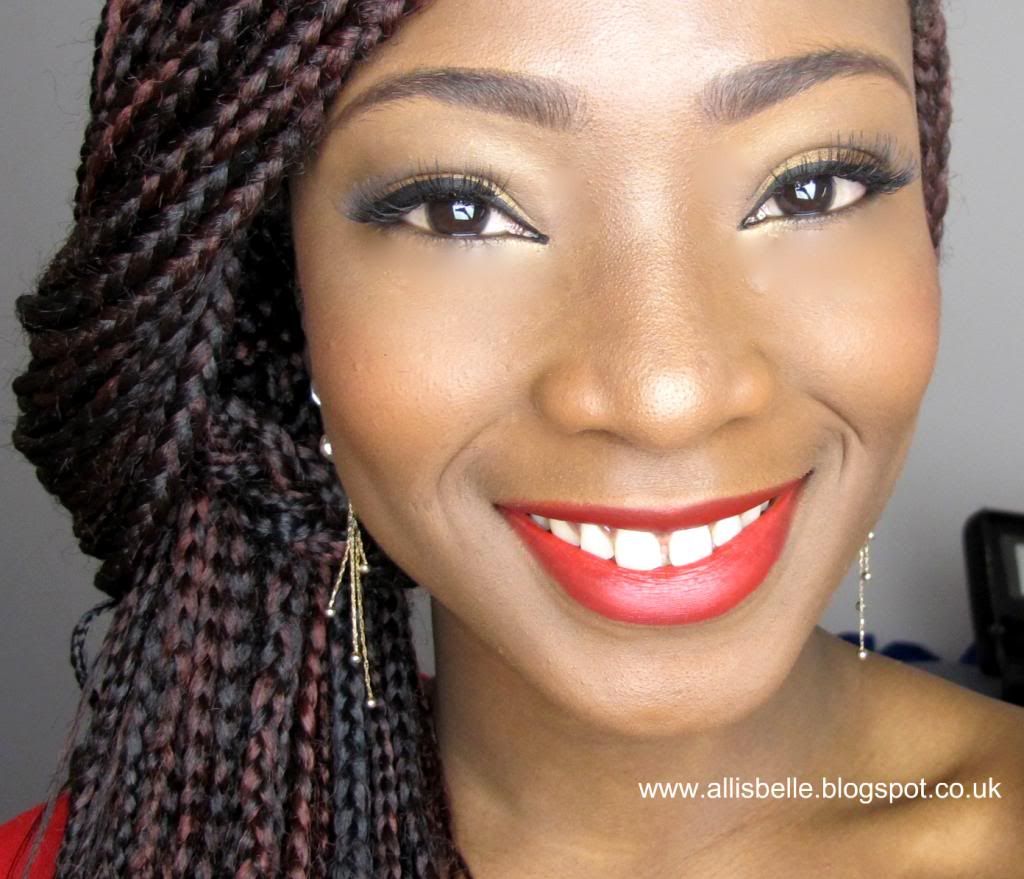
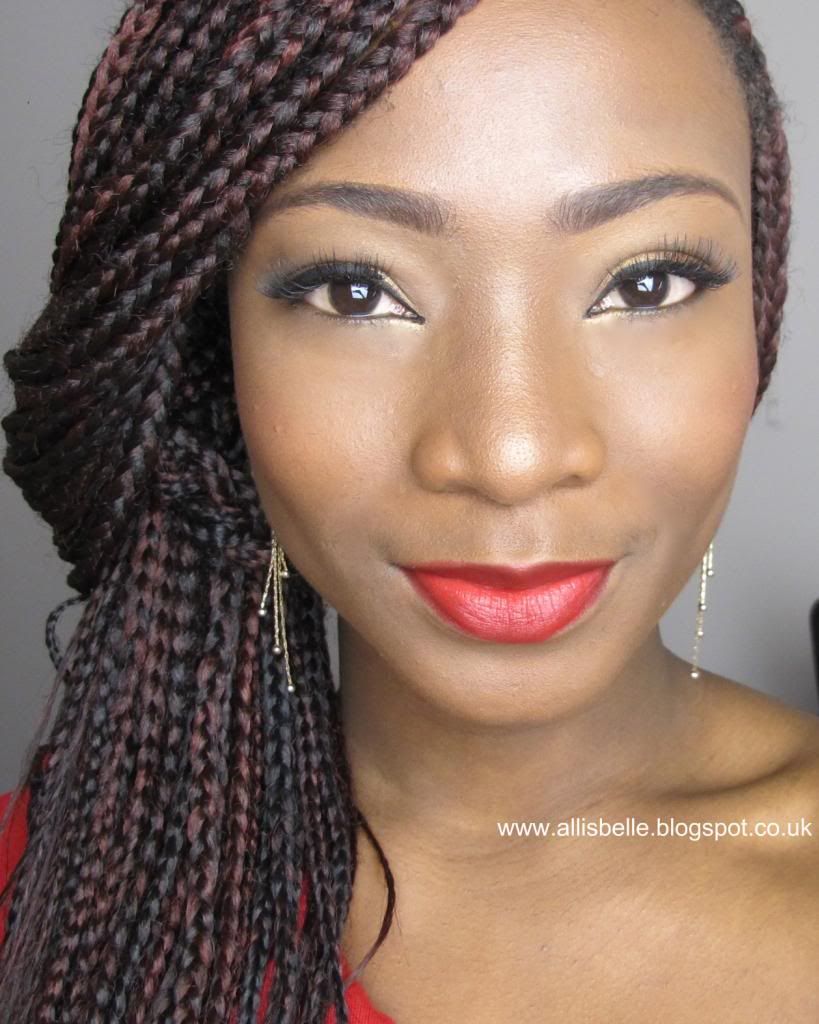
Winged Eyeliner Tutorial inspired by Dolce & Gabbana Models
One of the highlights of Milan Fashion Week for me was undoubtably the opulence of Dolce & Gabbana's collection and the gorgeous makeup sported by the Models. The looks were characterised by strong brows, deep berry lips topped off with the perfect winged eyeliner, also known as the cat eye!
Video - YSL Le Tient Touche Eclat Foundation Review
Finally got round to posting my YSL Le Tient Touche Foundation Review Video! Check out the full blog post review here and the tutorial for the Valentine's Day makeup look here.
So I unfortunately I wasn't able to film a video tutorial for this Valentine's day look but its very easy to follow. I've listed the products used and the order I applied them!
3. Setting Powder: Although I love YSL Touche Eclat Foundation's skin illuminating properties, I wanted a more matte look for my night out so I used the Ben Nye Skin Finish powder in Coco Tan as a foundation setting powder. It is largely translucent so the brightness of the YSL foundation still shines through. Use the powder lightly so it doesn't cover up the foundation and look 'cakey'.
4. Eyeshadow I - Urban Decay's Fun Palette:Using an eyeshadow brush, I applied the Baked gold shade all over the base of my eye lid, just stopping at the crease as I don't like my eye shadow extending all the way up to my eye brows!
5. Eyeshadow 2: Using a flat eye shadow brush, I created a cut crease with the brown powder in Sleek's dark face contour kit. A flat brush like this one makes is like a cheat way to create a cut crease as its quick and easy to get that defined line! After that I used a blending brush to blend the brown colour in.
7. False Lashes: Using duo eyelash glue, I applied my false eyelashes from Primark. They only cost a pound! Amazing value and natural looking.
8. Blush:I applied the blush by blending each colour from Sleek's Blush by 3 in Flame. I like the orangey -reddish colour it produces.
9. Highlight:I then applied the gold highlight from the sleek face contour kit on to the top of my cheek bones and down the bridge of my nose.
10: Eyebrow Highlight: Again using the Sleek highlight colour i defined under my eyebrows for that perfect illuminated arch.
11: Define Eyebrows:I used the eyebrow kit from Sleek MakeUP in Dark to define my eyebrows. I don't like the wax bit so I just brushed my eyebrows in place using a brow brush then filled them in using the dark colours.
12: Apply Lipstick: Unfortunately I was rushing off for dinner so didn't have time to do my lips properly but I applied my trusty MAC Ruby Woo as my lipstick for the night. Its a good idea to use lip liner before applying lipstick especially when you'll be eating but I'm not going to lie, I usually skip that step! Lip liner usually makes the lipstick colour last longer and adhere to your lips after kissing ;-) so don't be a lazy bugger like me this valentine's day!
I hope you guys like this look, please let me know if you did and I would LOVE to see your Valentine's day looks so please link your blogs, instagram or youtube channels below!
 One of the highlights of my week was the release of Beyonce's latest album and as I watched the visuals, I was taken by the variety and beauty of the makeup looks in the videos! One of my favorites is this look from the Blow video. Now, I am not a makeup artist, and I usually don't play around with this many colours on my face, but I was completely inspired and just had to attempt my own! How did I do? Video tutorial at the end of the post!
 I messed up a little and got the lip gloss on my teeth, left in for comedic effect but I'm pretty sure you can skip that step for your version!
 Tutorial -
- don't forget to subscribe!
Tutorial -
- don't forget to subscribe!