Valentine's Day Makeup: Red and Gold
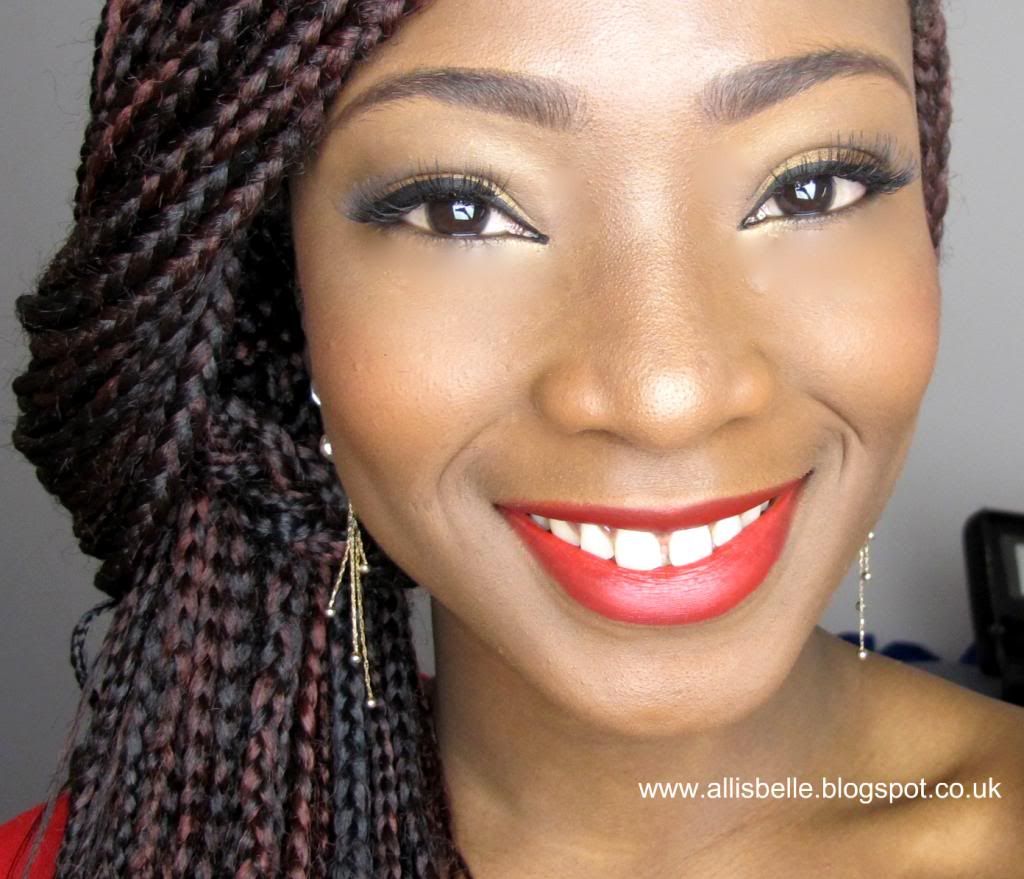
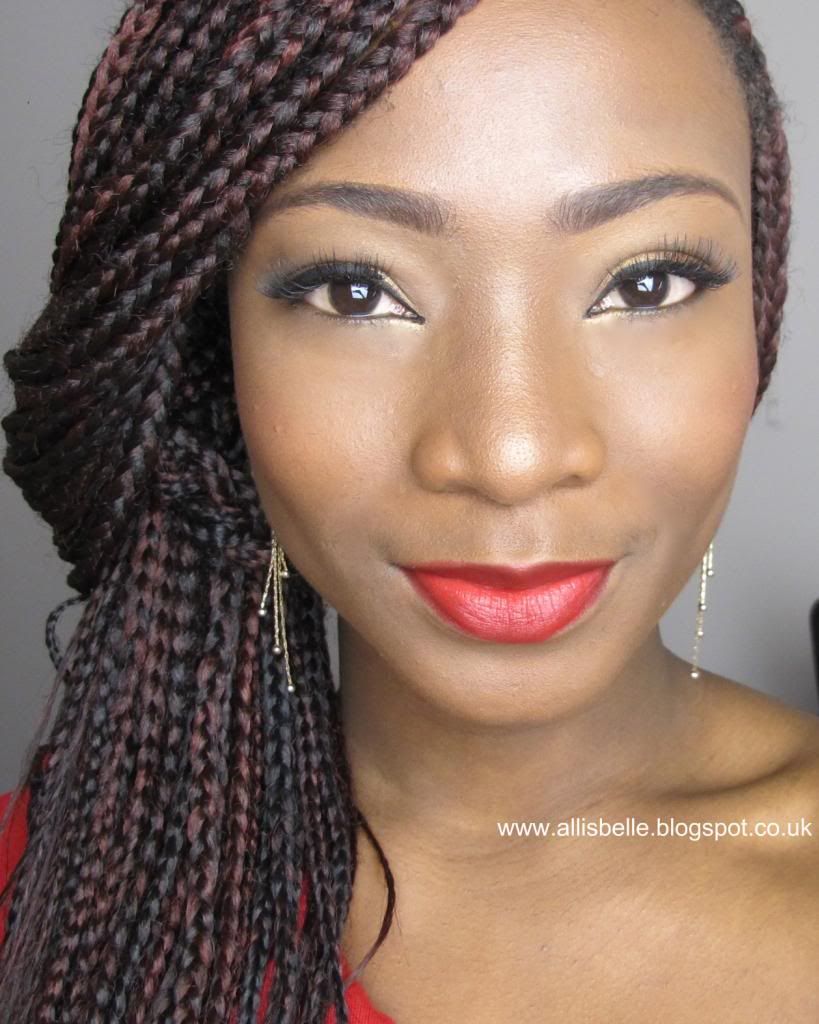

So I unfortunately I wasn't able to film a video tutorial for this Valentine's day look but its very easy to follow. I've listed the products used and the order I applied them!
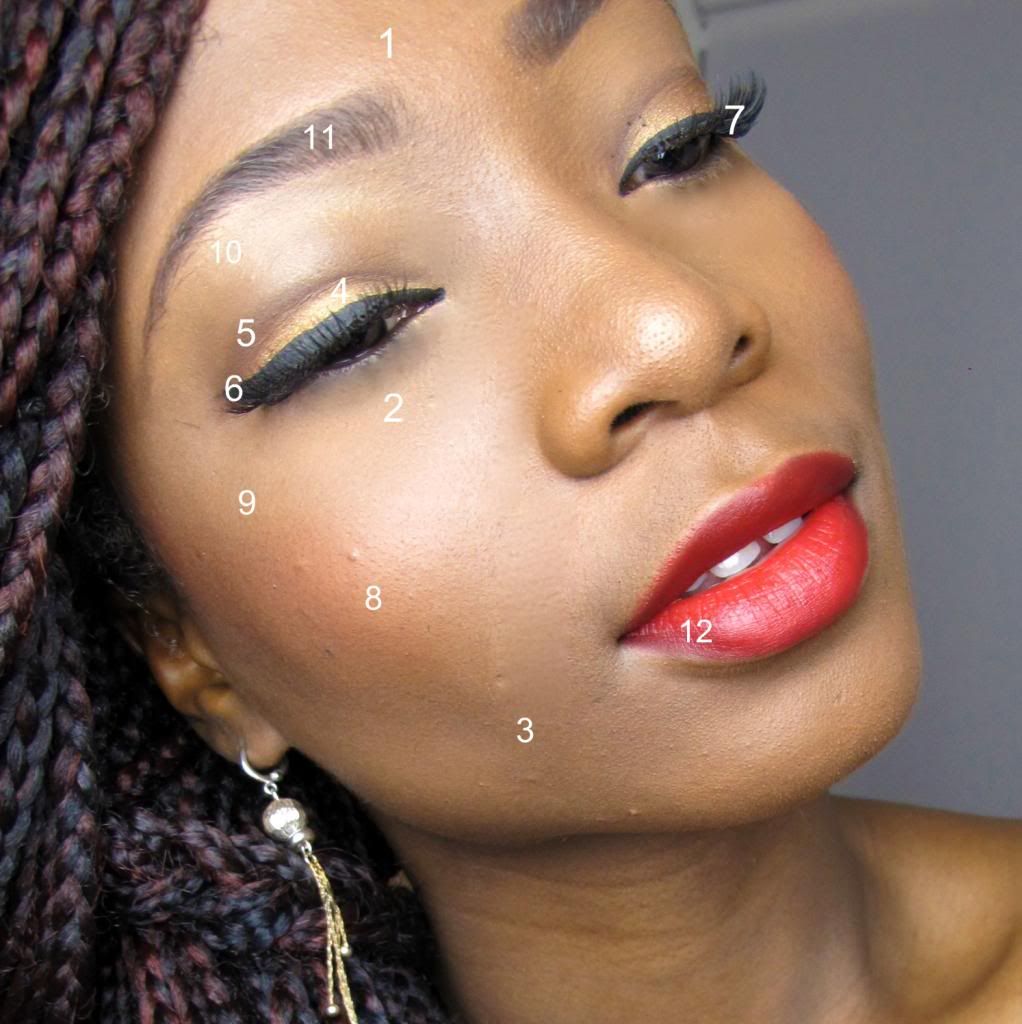
STEPS
1. Foundation: Applied YSL's Le Teint Touche Eclat Foundation in BD70 all over as my foundation base.
2: Concealer: Applied MAC's pro long wear concealer in NW40 in a 'U' shape under my eye's to brighten up the area and cover dark circles.
3. Setting Powder: Although I love YSL Touche Eclat Foundation's skin illuminating properties, I wanted a more matte look for my night out so I used the Ben Nye Skin Finish powder in Coco Tan as a foundation setting powder. It is largely translucent so the brightness of the YSL foundation still shines through. Use the powder lightly so it doesn't cover up the foundation and look 'cakey'.
4. Eyeshadow I - Urban Decay's Fun Palette: Using an eyeshadow brush, I applied the Baked gold shade all over the base of my eye lid, just stopping at the crease as I don't like my eye shadow extending all the way up to my eye brows!
5. Eyeshadow 2: Using a flat eye shadow brush, I created a cut crease with the brown powder in Sleek's dark face contour kit. A flat brush like this one makes is like a cheat way to create a cut crease as its quick and easy to get that defined line! After that I used a blending brush to blend the brown colour in.
6. Winged Eye: I created my usual wing eye/cat eye using my Black Rimmel Exaggerate Liquid Eye liner in black.
7. False Lashes: Using duo eyelash glue, I applied my false eyelashes from Primark. They only cost a pound! Amazing value and natural looking.
8. Blush: I applied the blush by blending each colour from Sleek's Blush by 3 in Flame. I like the orangey -reddish colour it produces.
9. Highlight: I then applied the gold highlight from the sleek face contour kit on to the top of my cheek bones and down the bridge of my nose.
10: Eyebrow Highlight: Again using the Sleek highlight colour i defined under my eyebrows for that perfect illuminated arch.
11: Define Eyebrows: I used the eyebrow kit from Sleek MakeUP in Dark to define my eyebrows. I don't like the wax bit so I just brushed my eyebrows in place using a brow brush then filled them in using the dark colours.
12: Apply Lipstick: Unfortunately I was rushing off for dinner so didn't have time to do my lips properly but I applied my trusty MAC Ruby Woo as my lipstick for the night. Its a good idea to use lip liner before applying lipstick especially when you'll be eating but I'm not going to lie, I usually skip that step! Lip liner usually makes the lipstick colour last longer and adhere to your lips after kissing ;-) so don't be a lazy bugger like me this valentine's day!
I hope you guys like this look, please let me know if you did and I would LOVE to see your Valentine's day looks so please link your blogs, instagram or youtube channels below!
Enjoy your day!
xxx
Labels: mac makeup, makeup tutorial, makeup tutorial for woc, red lips makeup, ruby woo, Valentine's day, Valentine's Day Makeup, Valentine's day Makeup tutorial, ysl le teint Touche Eclat Foundation


